Gluey_trails
Likes Dirt
Building DJ'S
Location,Location, Location
Your location is almost critical because if you have an awesome place where it is flat and has water nearby and no run in it is like a chick in a gay bar, POINTLESS.
My tip is get a map or better use Google Earth to sus out a good place to build. It should be near water, not close to roads or bypassers, have a good run in, have plenty of room for dj's, some shade because it does get hot riding and most importantly NOT in a national park.
Find two or three possible areas to build because more likely then not you will find that the place is unworkable or doesn't have the features of above.

Equipment
Some equipment which is great to have down there are:
- Shovels
Shovels are the pynical tool to have down there. You should have one for shifting (a shifting one is a large headed one with curved sides. Sometimes also called grain shovels), one for digging (The digging shovel is usual circular head with a point to get into the ground. It also has a long wooden handle without that loop on the end), and a normal shovel (this shovel should have a short handel and a loop on the end with a flat bottom for shaping without the small bend areas).
- Hoes
Hoes are excellent things to use especially if digging a big pit or have an annoying root in the way. The heads of these come in big or small sizes. The smaller one is usually the better one to go for mainly because it doesn't have as much surface going through the dirt.
- Picks
Picks are the excellent tool to get through the pesty root or the hard clay. Great for digging pits and drainage. Just make sure you don't use an old one because the head tends to slide down the handle and could break your fingers if you aren't lucky.
- Buckets
Buckets are great to have down at your DJ's because they can shift dirt and carry water and are good if you can't get a wheelbarrow down into your area.
- Wheelbarrows
These things are the tank of building DJ's. Moving a heap of dirt is just that much easier with a wheelbarrow. Make sure your wheelbarrow has offroad tyres cause you don't want your dirt falling into the creek.
- Rakes + Brooms
Rakes are great for moving useless dirt out of the pit instead of using your shovel and missing and cutting into the lip. Brooms are also handy to sweep puddles out of your pit.
- Axe
An axe is handy for hammering in pickets cutting roots, chopping fallen trees and cutting wood into smaller pieces to fit into your jump. A hatchet is probably your best and cheepest way to go but those bigger ones are also awesome.
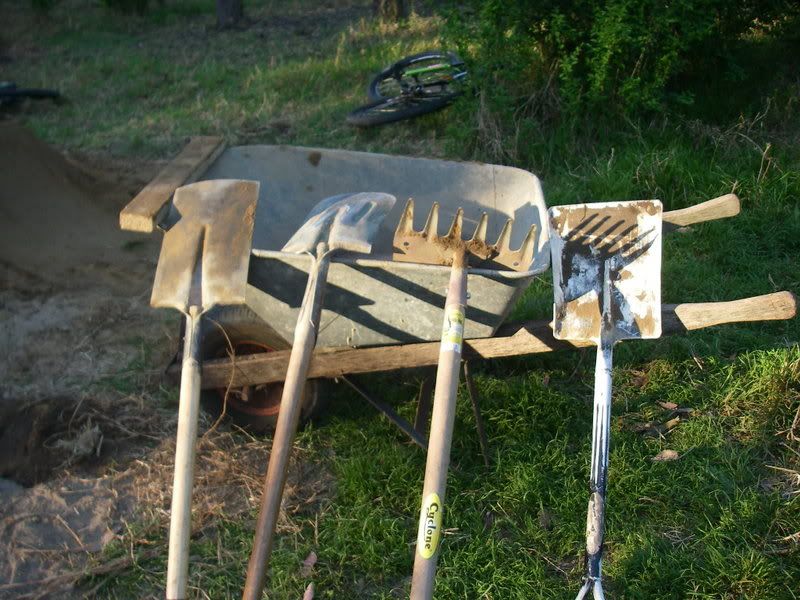
KEEP YOUR TOOLS WELL MAINTAINED!
It is essential to keep your tools clean, otherwise it will; Take more energy to do things, will cost you more money with replacing your tools, may cause injury if you're handel snaps.
Follow these steps: (Info taken from http://www.demesne.info/Garden-Help/Garden-Tool-Care.htm)
Wood parts
Wood handles on long and short tools need to be sanded and oiled at regular intervals, usually once a year is enough. Wipe off the handle to clean, and use little if any water. Use fine sand paper to smooth the surface. Remove the dust and rub linseed oil into the handle. Let it soak in. Use as much as it takes until it doesn't absorb any more. Wait about a half hour, then dry off any remaining on the surface.
Metal PartsOnce a year, clean metal surfaces with a wire brush to remove dirt and light rust.
If the rust is a bit worse, you can sometimes remove it by soaking the tool in white vinegar; otherwise, use steel wool. The extent of the rust determines what grade to use. Start with the least coarse grade you can to remove the rust. Once the rust is removed and the entire surface is clean, you can apply a rust-proofing primer. Steel wool and repaint any rough areas.
File the cutting edge of your metal tools to keep the blade sharp
Run In
To start you need either flat ground or a slight downhill slope to your jumps. Usually a downhill slope is best because it doesnt take it out of you when pedalling and you won't need as much space.
You basically need to clear the ground about a foot wide, maybe less but it doesn't really matter, aslong as you remove any debris under tyre which may cause alot of friction or effort out of your pedal. For instance Grass, Bark, Sand alot of the time he debris will eventually wear away from constant riding but if this does not work you need: Rake, broom, hoe to remove it.
If there is not enough room to get the speed consider putting in some berms to lengthen the run up by snaking it around or putting some pumps in to increase speed but unfortunatley you need to build pumps carefully so that you increase rather then decrease. To build pumps and berms look below.
Basically you just need to make a run in to get speed. So find your quickest root.
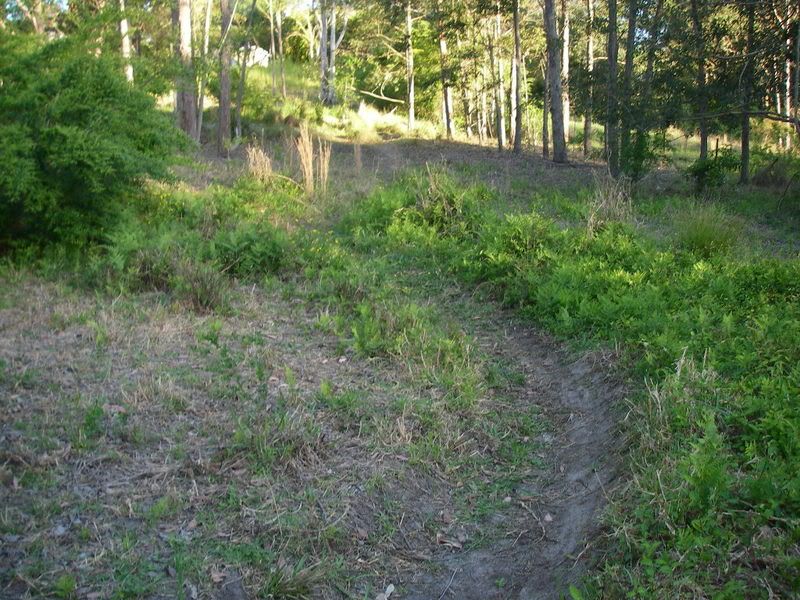
The DJ's
1. Firstly you need to work out where your Up Ramps (UR) and Down Ramps (DR) are going to be and where your line will be. you should mark it out with spray paint.
2. You need to then start digging your pit. Dig them nice and deep until you hit clay. Don't make drainage as yet because you want the clay to soak in the water to make it easier to dig or you get water from a nearby creek/lake/river/tap/(whatever).
3. Once the clay is fairly easily accessable(sp?) dig all the clay that you need. (make sure that the pit is in a nice curve so its a smooth transition from Down to Up)
4. Put logs or rocks or whatever object you find into the jumps as long as there hard just so you don't need as much clay and if need be put picks behind them so the logs don't roll. This is also covered HERE
5. Put all your clay that you have in the area where you want your jump. Every once in a while you put clay in make sure you compact it hard jump up and down because if you compact when you've got all you clay there you will end up absolutely rooted from the ammount of effort.
6. Continue putting layers of clay onto the jump then Compacting. The jump will then be real solid and is ready for shaping.(You could even leave the shaping for another day just so it is easier to shape)
7. To shape the jump you will need to compact the face and top first so you can climb onto the top safety and be able to cut away hard clay without ruining or taking out chunks. (The top of the jump should have a flat top just so the lip won't crumble away)
8. Once this is done soak the jump again and soak it through and through. Get a flat faced shovel and hit the face the back and the side so it is smooth and is aesthetically(sp?) orgasmic.
9. Go to your local water supply and fill up a bottle. Poor water over the back of the shovel so the clay won't stick to the back of the shovel as this is extremely annoying and can sometimes reck the whole face. Compact the clay till it is smooth and it looks like chocolate mouse.(Mine once looked so good I licked it. Tasted good too).
10. Continue this for the entire face of both the DR and UR until your happy with how smooth it is and your BMX friends won't winge that its bumpy.
11. Leave the Jump for about 4-5 days maybe less if it has been sunny for 3 days in a row but to be sure leave it for 4-5 days.
12. If you want you can also put carpet on the lip and downramp to protect from breaking but if you build it properly it should be fine.
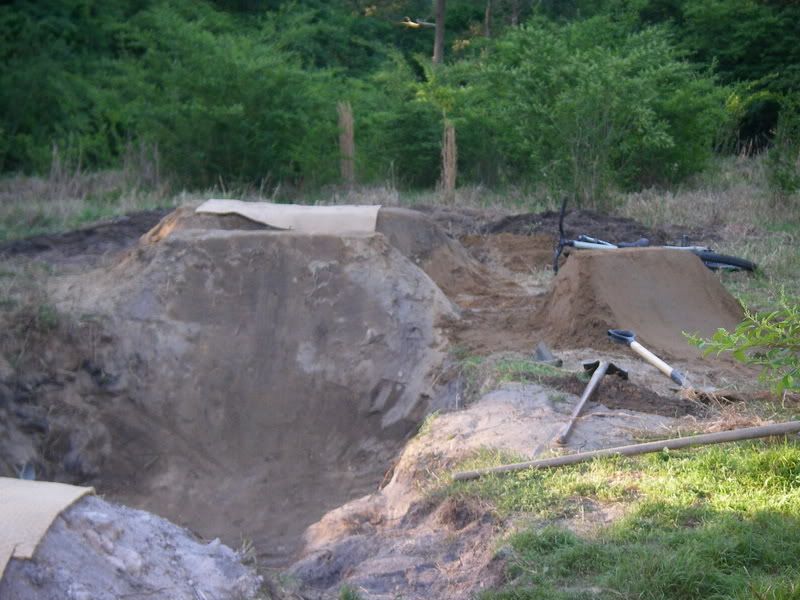
The Pit
A pit should be as deep as you want it or simply deep enough so you get enough dirt out of it. The pit we made is about thigh deep and is a continuous curve from the bottom of the DR to the start of the UR.
Get your mates to help dig and you will be amazed how quick a pit gets dug. Red Cordial makes 'em work faster.
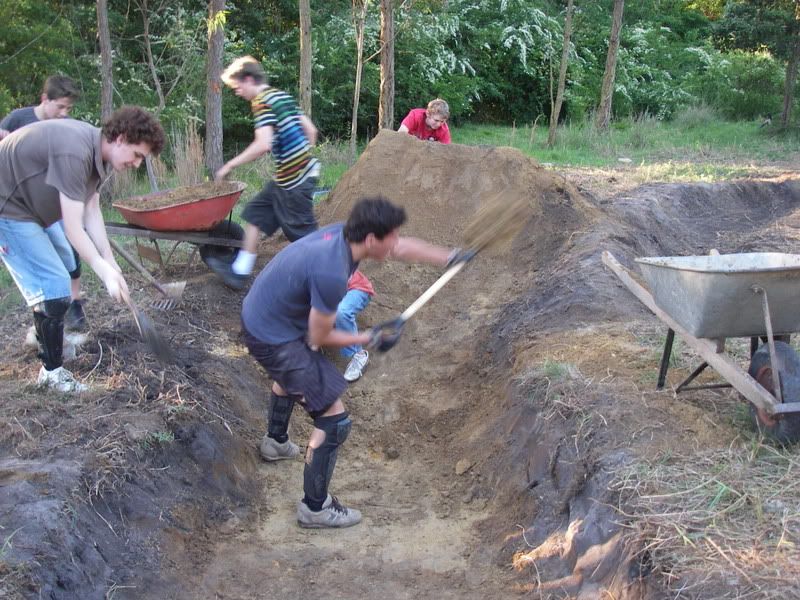
Drainage
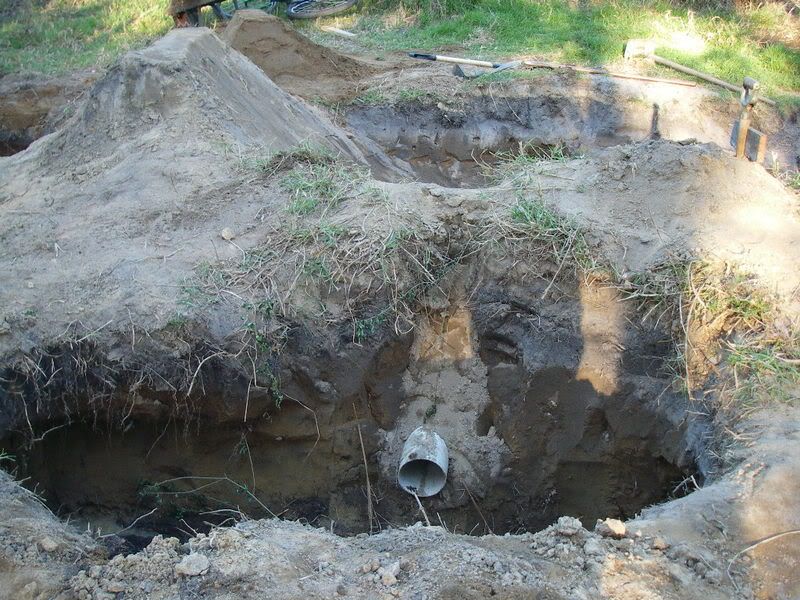
A pit should usually have drainage which can which drains unwanted water into a puddle where it won't be in the way or where the water could be used to water the jumps. As pictured below, a slight trench has been cut on the side of the pit. Once the rain comes and if your pit is in a nice curved shape it should flow into the trench and once the trench starts filling up it will go into the pipe leading into the the hole. There for a dry pit to be jumped the next day.
NOTE: The end of the drainage should be lower then the lowest point of the pit.

Berms
Berms aren't a neccessaty(sp?) at your DJ's only if the run in is abit tricky. To build a good berm you need to put pickets at where you propose the back of your berm to be. Pile up logs and things of that sort just so you don't need too much dirt. Dig down at where you propose the front of your berm and put the dirt on the logs.Continue this proccess around the whole berm until you are happy. Compact the dirt until it is hard and water down. Don't get to fussy about smoothing it as it will be the most torn up part of the track. Also covered HERE
Pumps
Pumps are the piles of dirt you put on a really big tree or log which isn't possible to move. It may slow you don't but you will find that out when you are doing the practice run-ins. The pump should have a gradual lift up and a steeper down bit just so you can possibly get some speed back.
END RESULT!

Photos have been produced by wdshiver and is of non-existant/destroyed Jumps
Last edited:

