road bike build - from scratch

tmarsh

Likes Dirt
I'm starting to build a new road frame for a friend of mine, and I though people might be interested if I documented it.

The frame will be lugged construction, made from Columbus Zona. It's designed as a winter trainer, although I imagine it will get a lot of use all year round. Compact geometry, with a slightly sloping top tube. Clearance for mudguards. It'll be a slow process, as I work full time and have a toddler, but if you can be patient, you'll see a frame get built.


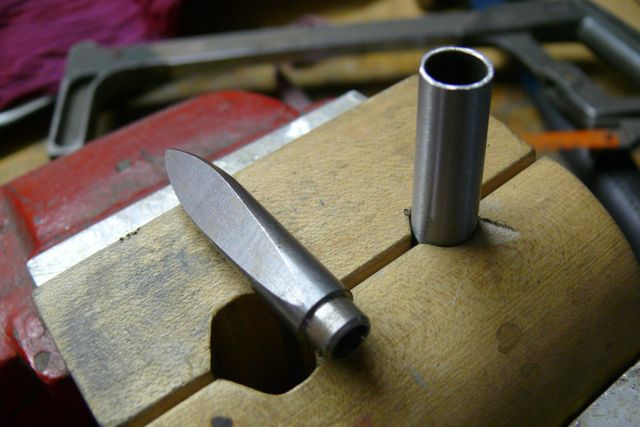
[Lower head lug. These are nice, with a built-in 5mm threaded adjuster. Best used with Shimano, as they interfere with Campy brake arms]


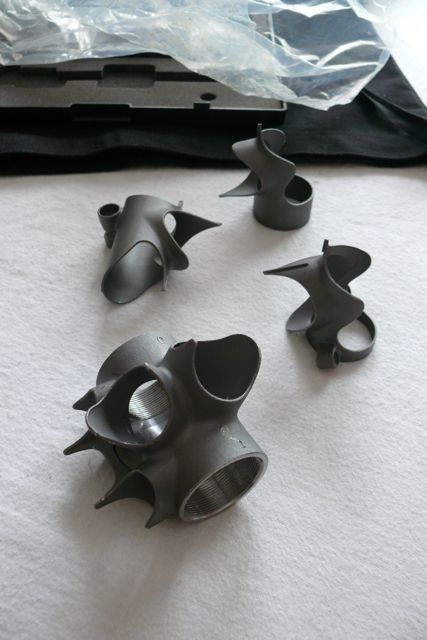
[complete lug set. They are in a raw state at the moment, with a fair bit of clean-up to come, and some modification of the edges for aesthetics]


[inputting all of the lug dimensions into CAD software. It's still in the design stage so it'll be a little while before I start hacking up tubes or lugs]
 

Fifteen.Hundred

Likes Dirt
Road bike build from Scratch..... yep, you wern't kidding about the "from scratch" part.:p

Looking forward to seeing the build progress. Good Luck!
 

m_g

Likes Dirt
noice!! this should be very cool
where do you buy lugs from (just out of interest), or did you make those too?
 

tmarsh

Likes Dirt
where do you buy lugs from (just out of interest), or did you make those too?
The lugs are designed by Brisbane builder Darrell McCulloch and cast by Long Shen in Taiwan. I'll modify them a bit, but designing lugs is waaaaay beyond my skills.
 

tmarsh

Likes Dirt
Some small progress. Tubes are identified and their orientation and butt lengths are marked. The top tube and down tube are both .8/.5/.8 Columbus Zona, the seat tube is .8mm at the bottom bracket and .6mm at the seat cluster. That should make it a nice fit for a 27.2mm seatpost.


Butt lengths and transitions are marked. This can be critical in some builds as you don't want lug points protruding into the transition sections or worse still into the thin middle sections.


Some cleanup on the bottom bracket. Some casting irregularities have been filed off and some small details added. A trial fit with the seat tube shows it's a nice fit, the down tube is a little snug and will need to be opened up a bit. The oval chainstays will need to be squished a bit to make a good fit for the chainstay sockets.


Fleur-de-lys shaped water bottle bosses and reinforcing diamonds. These are great, but the fleur-de-lys detail is a little too fancy for this frame.


So, out with the Foredom (basically a Dremel on steroids with a big external motor. It rocks.)


...leaving a much simpler version.


more soon.
 

mtb1611

Seymour
Awesome work mate! I have an immense amount of respect for anyone who possesses the skills to turn out something as beautiful as a custom road frame. Really looking forward to following your project.
 

C Dunlop

Likes Dirt
this is rad. while a decent whack of mechanically apt people could give something like this a crack, it is rad to see someone actually doing it.
 

Tomas

my mum says im cool
Im sure the guys at velocipidesalon would be eager to pass on some advice if you needed it! Looks great mate.
 

tmarsh

Likes Dirt
Pretending to be a single parent this weekend, so I haven't had much time. I did sneak a couple of hours after the boy went to bed though...


Uncut head tube. Measuring and marking before...


Cutting it to length on the bandsaw.


Marking the centreline, so I can make sure that the upper and lower head lugs are in the same plane. Easiest way to do this is to lay the tube in some aluminium angle and run a marker or a scriber along the edge of the angle.


Drilling pin holes in the head lugs. I use a system of removable pins to keep various parts in alignment during the build. There are other ways of doing it, but once you get the hang of this it's a pretty handy way of doing it. First, I drill a 2.4mm hole in the lug. Then position the lug in the correct spot and drill through the tube. Then a 2.5mm nail is ground to a slight taper and gently hammered in the hole. The pins stay in place throughout the brazing and are cut flush and filed down afterwards.


Pinned head tube.


And at the other end of the bike, seat stays and seat stay end caps. There are a million ways of attaching seat stays to the seat cluster, and this is one of them. A cap is brazed to the seat stay and then the whole assembly is brazed to the lug. I would normally braze the seat stays to the back of the seat binder bolt, but this bike is going to be running mudguards so I thought some extra clearance wouldn't go amiss. You can't see it, but the other side of the end cap is profiled to exactly the same curve as the seat lug, which will give the final braze a huge surface area to work with, making for a very strong joint.


Trial fit then...


Ready to braze. You can't see it here, but inside the seatstay is a coil of brass. I'll heat the whole assembly up to temperature and then hopefully the brass will all melt at once and the join between the tubes will be a neat little golden ring, with 100% penetration inside the join. More pics when I've soaked the flux off and have some more time...

Edit:
Next morning, the flux was soaked off and after some work with a file and some emery cloth... If you look closely you can see the ring of brass that marks the join between the tube and the top cap.

 
Last edited:

tmarsh

Likes Dirt
Big session in the shed over Australia Day. The bike is starting to look a lot more like a bike as opposed to a collection of tubes.


This is my build bible. The image on the front has the main dimensions, but the pages behind it have all the nitty gritty detail. Like the distance between miters.


Mitering the tubes is fiddly and boring work. So I didn't take any photos of it. But here is the seat-tube end of the top tube. It needs to snug up against the seat tube with 100% contact so that the silver braze will flow around the whole joint.


Looking a lot like a bike!


Water bottle bosses in place.


Brazing 'finger'. It's nothing more or less than a thick bit of flat steel bar with the end ground to a point. The other end is resting on my trusty lab stand and basically all it does is put enough pressure on the braze-on to hold it in place while you do your work.


Post-braze. Silver braxing flux comes off easily in hot water. So, off to the kitchen for a scrub...


... and after a scrub and a tiny bit of clean-up with some emery cloth.


Nothing terribly exciting here, just a shot of the business part of my shed. Bicycle specific tools on the left, workstand and oxy/propane torch in the middle, and my main vice and general tools to the right. Hard-rubbish Bang & Olfson stereo bolted to the wall above the red toolbox.


Road frame I built over winter awaiting paint. Really should get around to doing that soon...


Finally, a steel fork for the frame I'm building at the moment. 1" threadless steerer tube, Columbus Nivacrom legs and drop-outs with mudguard eyelets.

That's it for me for the day.
 

dain2772

Likes Bikes and Dirt
that is one hell of a shed. i like the casual 'this is a frame I built last winter' as if you had just thrown together a few tubes in an afternoon...
 
Top