SMIIISH
Likes Bikes and Dirt
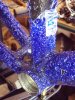
New build project!
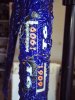
A frame set which I procured, which is in shocking condition. Stickered up. Built it up and love it, so I have decided to build it up propperly and give it a raw job to flaunt the sexy 6061 aircraft aluminium.
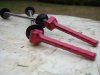
...plus a few raunchy parts to go with.
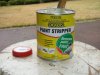
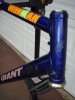
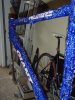
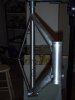
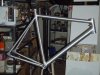
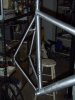
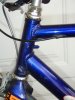
So strip time and rebuild. Good bone structure. Mechanically A1. Uni break so I have a bit of time.
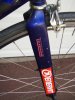
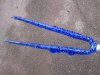
Here she is.

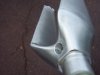
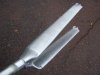
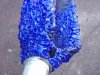
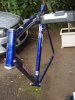
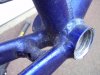
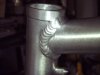
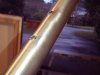
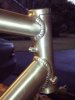
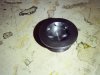
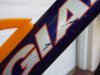
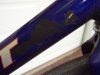
Original pain job is shot. Flaking and peeling off. Down to factory primer/sealer.

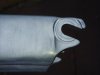
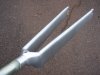
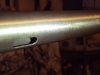
Some nice gouges where you'd be looking.

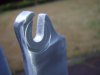
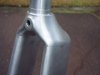
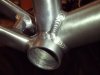
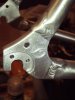
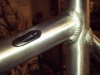
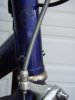
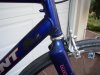
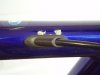
Internally routed cables. Decent bone structure. Early signs of oxidising. Should be able to save it.

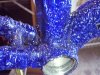
blurgh!

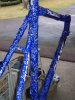
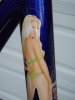
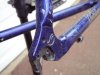
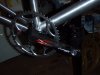
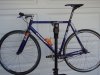
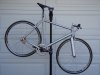
Final Product

SPEC
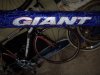
Frame - Giant Peloton 8400 - 1.315kg - $FREE.00
Front fork - Giant Peloton 8400 - $FREE.00
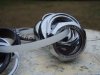
Handlebars - BBB fibertop - RRP $79.95
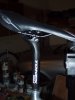
Stem - Basic 1" quill, single pinch bolt - $FREE.00
Headset - Specialized 1" threaded ball bearing - $FREE.00
Grips - Foamies - RRP $10.00
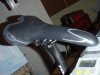
Saddle - Selle Italia Filante Saddle - RRP $40.00
Seatpost - Token mono-Q - RRP $90.00
Front brake - Dia-Compe BRS101 - Ebay - $65.00 (for front and rear)
Rear brake - Dia-Compe BRS101 - Ebay - $65.00 (for front and rear)
Levers - Avid Speed Dial 7 - RRP $45.00
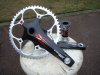
Cranks - Token Mono-Q Road 172.5mm 53t - RRP $350?
Chain - Shimano HG93 with dummy link - RRP $50.00
Tensioner - Fireeye Spur - RRP $60.00
Jockey Wheel - KCNC - RRP $30.00
SS Kit - A2Z 18t - $FREE.00 with Token Lockring - RRP $10.00
Cage bolts - KCNC and Brand-X - RRP $10.00 ($30.00)
Chainring Bolts - Brand-X - RRP $20.00
Wheelset: - RRP $200.00
Front hub - FSA Ball bearing
Rear hub - FSA ball bearing
Front rim - FSA with BBB rimstrip
Rear rim - FSA with BBB rimstrip
Spokes - Straight gadge silver
Nipples - Unknown
Tyres - Michelin Pro Race Slick - $50.00 ($100.00)
Tubes - Merick - RRP $8.00 ($16.00)
Skewers - Token Titanium - RRP $100.00
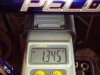
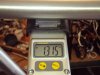
Total weight - 7.670kg (without pedals)
A frame set which I procured, which is in shocking condition. Stickered up. Built it up and love it, so I have decided to build it up propperly and give it a raw job to flaunt the sexy 6061 aircraft aluminium.
...plus a few raunchy parts to go with.
So strip time and rebuild. Good bone structure. Mechanically A1. Uni break so I have a bit of time.
Here she is.
Original pain job is shot. Flaking and peeling off. Down to factory primer/sealer.
Some nice gouges where you'd be looking.
Internally routed cables. Decent bone structure. Early signs of oxidising. Should be able to save it.
blurgh!
Final Product
SPEC
Frame - Giant Peloton 8400 - 1.315kg - $FREE.00
Front fork - Giant Peloton 8400 - $FREE.00
Handlebars - BBB fibertop - RRP $79.95
Stem - Basic 1" quill, single pinch bolt - $FREE.00
Headset - Specialized 1" threaded ball bearing - $FREE.00
Grips - Foamies - RRP $10.00
Saddle - Selle Italia Filante Saddle - RRP $40.00
Seatpost - Token mono-Q - RRP $90.00
Front brake - Dia-Compe BRS101 - Ebay - $65.00 (for front and rear)
Rear brake - Dia-Compe BRS101 - Ebay - $65.00 (for front and rear)
Levers - Avid Speed Dial 7 - RRP $45.00
Cranks - Token Mono-Q Road 172.5mm 53t - RRP $350?
Chain - Shimano HG93 with dummy link - RRP $50.00
Tensioner - Fireeye Spur - RRP $60.00
Jockey Wheel - KCNC - RRP $30.00
SS Kit - A2Z 18t - $FREE.00 with Token Lockring - RRP $10.00
Cage bolts - KCNC and Brand-X - RRP $10.00 ($30.00)
Chainring Bolts - Brand-X - RRP $20.00
Wheelset: - RRP $200.00
Front hub - FSA Ball bearing
Rear hub - FSA ball bearing
Front rim - FSA with BBB rimstrip
Rear rim - FSA with BBB rimstrip
Spokes - Straight gadge silver
Nipples - Unknown
Tyres - Michelin Pro Race Slick - $50.00 ($100.00)
Tubes - Merick - RRP $8.00 ($16.00)
Skewers - Token Titanium - RRP $100.00
Total weight - 7.670kg (without pedals)
Attachments
-
 234.4 KB Views: 1,838
 -
 238.3 KB Views: 1,794
 -
 237.7 KB Views: 449
 -
 246 KB Views: 1,801
 -
 233.7 KB Views: 436
 -
 268.9 KB Views: 1,805
 -
 218.4 KB Views: 426
 -
 253.1 KB Views: 1,786
 -
 229.7 KB Views: 457
 -
 233.1 KB Views: 586
Last edited: