ozzybmx
taking a shit with my boobs out
Ok guys , as posted yesterday i was having a bit of a problem with the old 3 cornered jacks.....
http://www.farkin.net/forums/showthread.php?t=128397
So i spent a lot of time last night trying to work out how to get back in the saddle ASAP without costing a shit load and taking a week .
So here goes with my $30 tubeless mod , i wouldnt have believed it if i hadnt seen it first hand ABSOLUTELY UNBELIEVABLE !
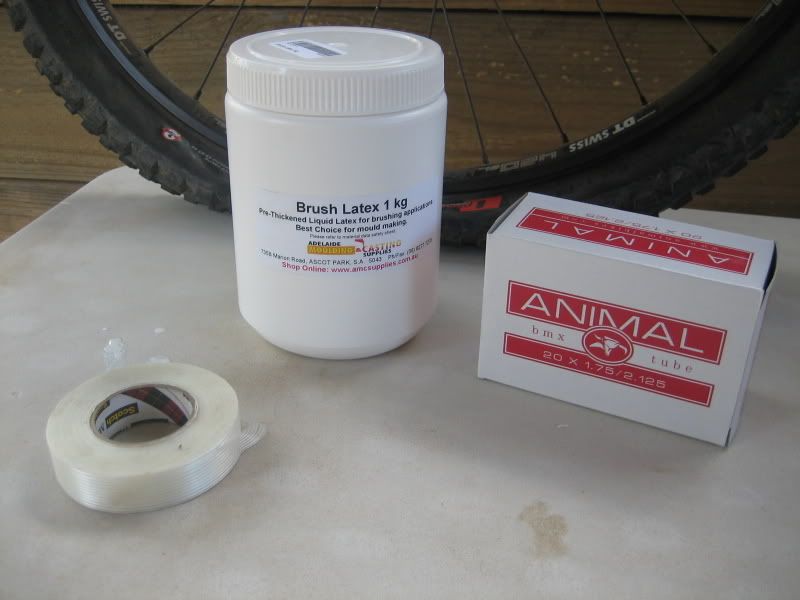
First get the bits ,
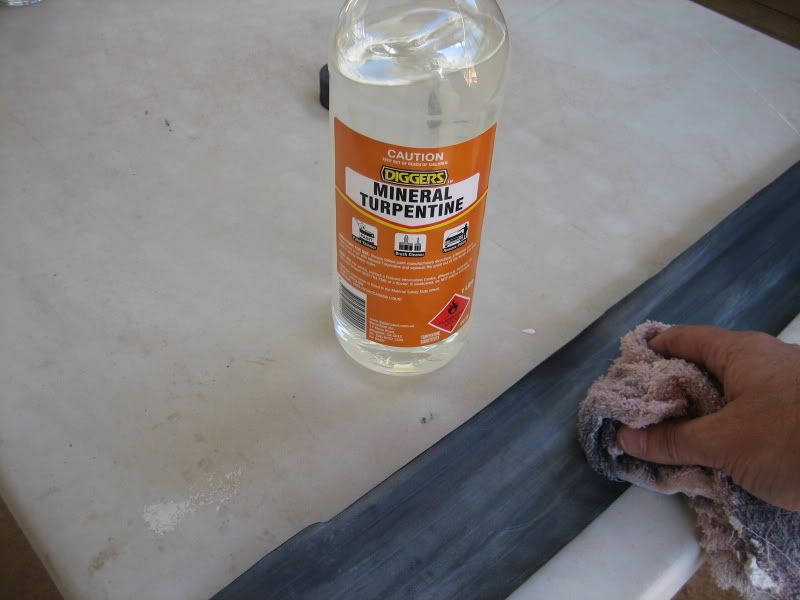
I read on someone elses mod that they used this tape as an air sealer , so just to be double safe i removed the rim strips and put this on.
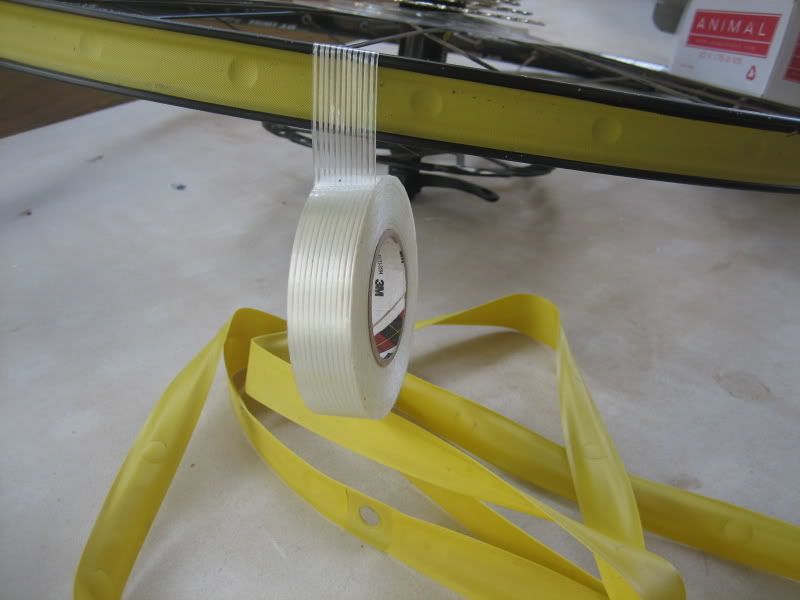
Put it on as tight as you can, you wont break this tape . once round is enough , overlap by 50mm .
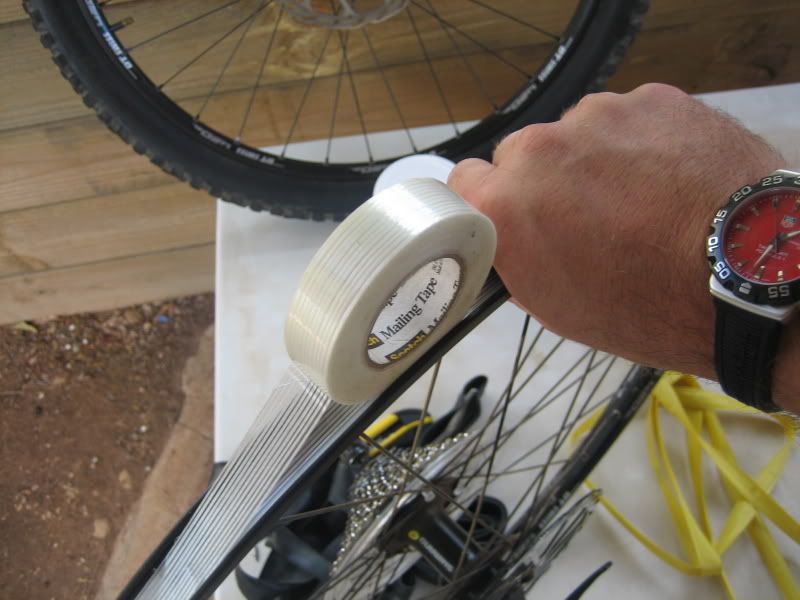
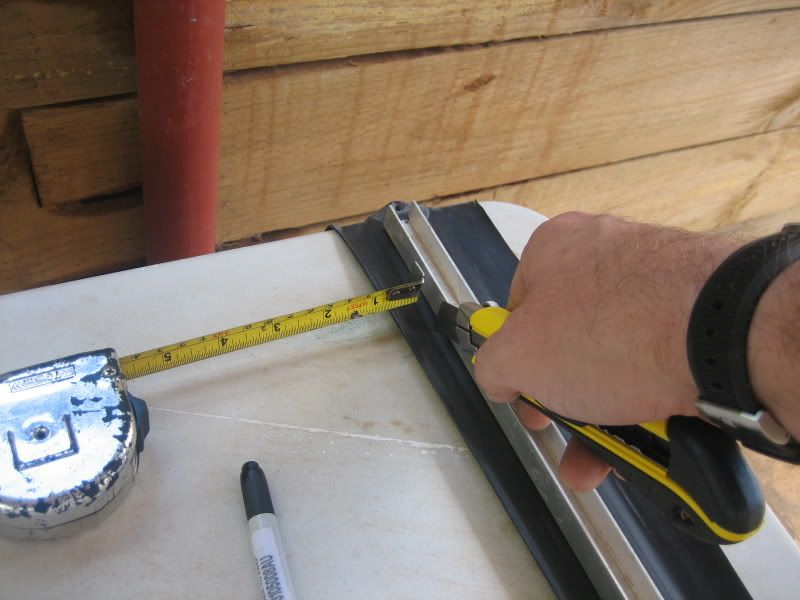
Use a stanley knife and a small round file to make the valve hole neat .
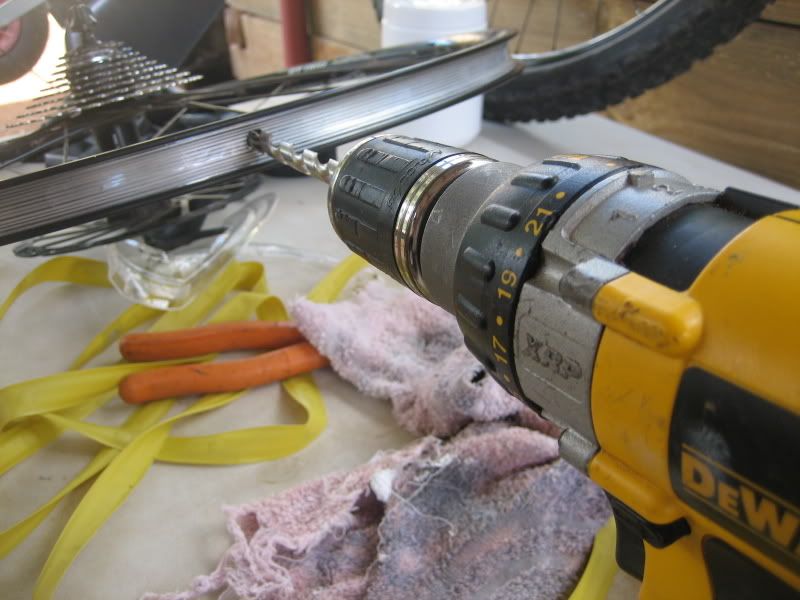
The BMX tubes have a bigger valve than the presta so i had to drill the outer rim valve holes 11/32.
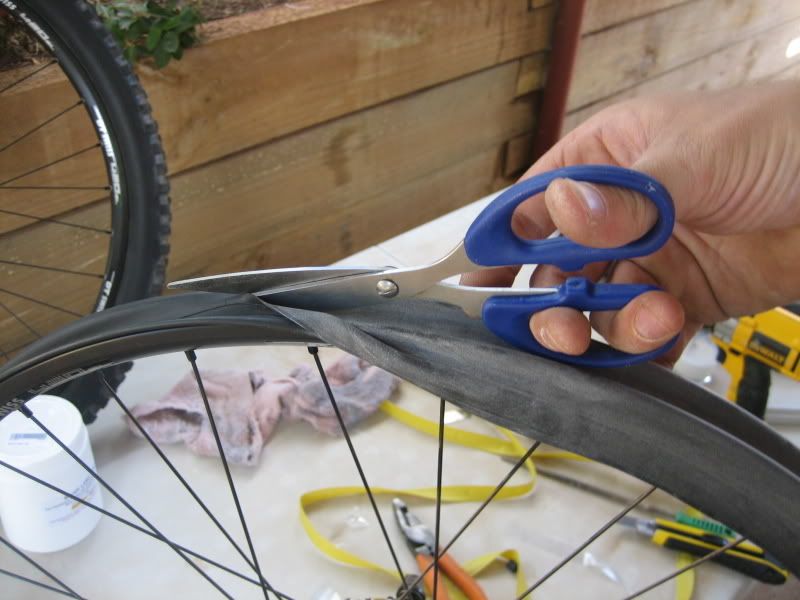
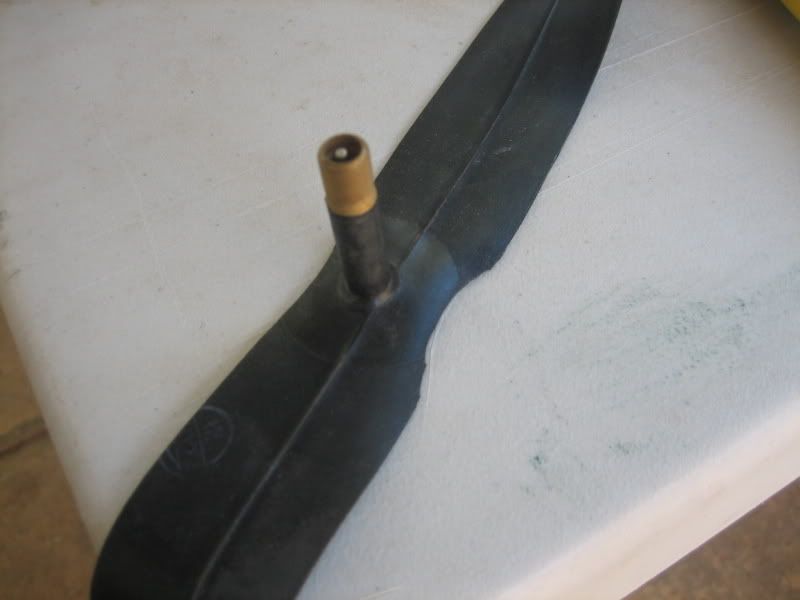
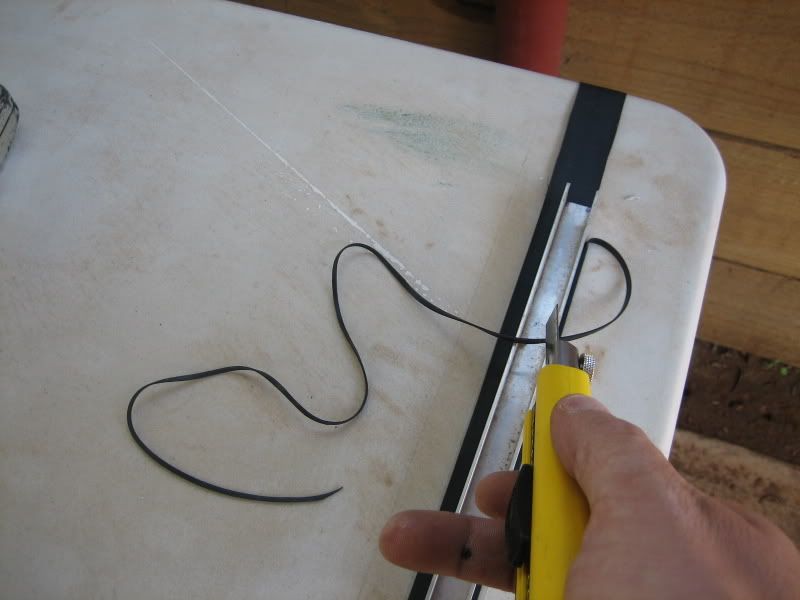
Stretch the bmx tube onto the rim (as if you were going to fit it) putting the valve through the hole. Then cut around the outside edge of the tube (oppisite side from the valve)
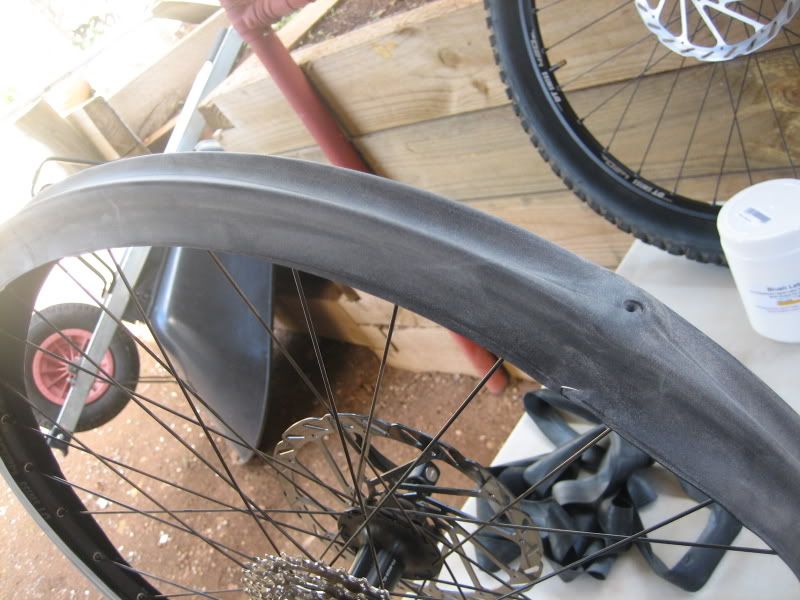
when you have cut all the way around it will look like this ...
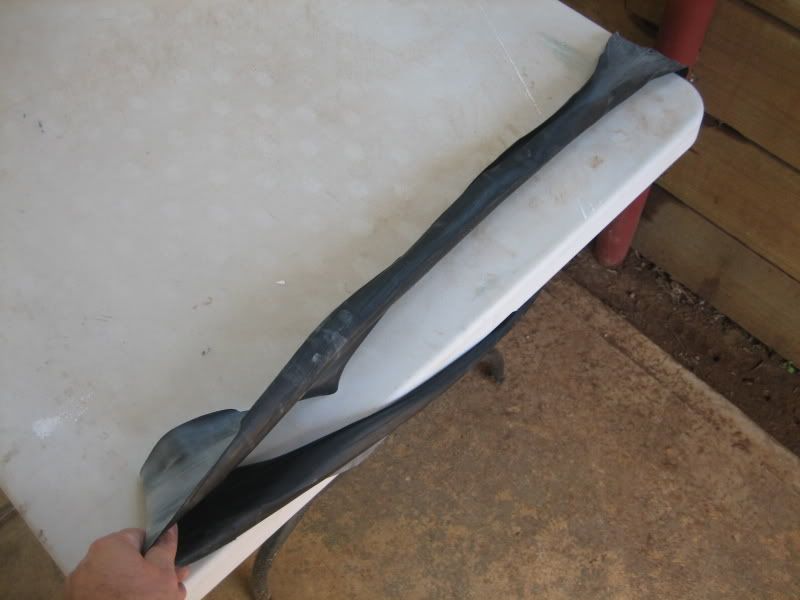
You now need to cut the tube down into a "rim strip" , stritch it around a table to make cutting easier
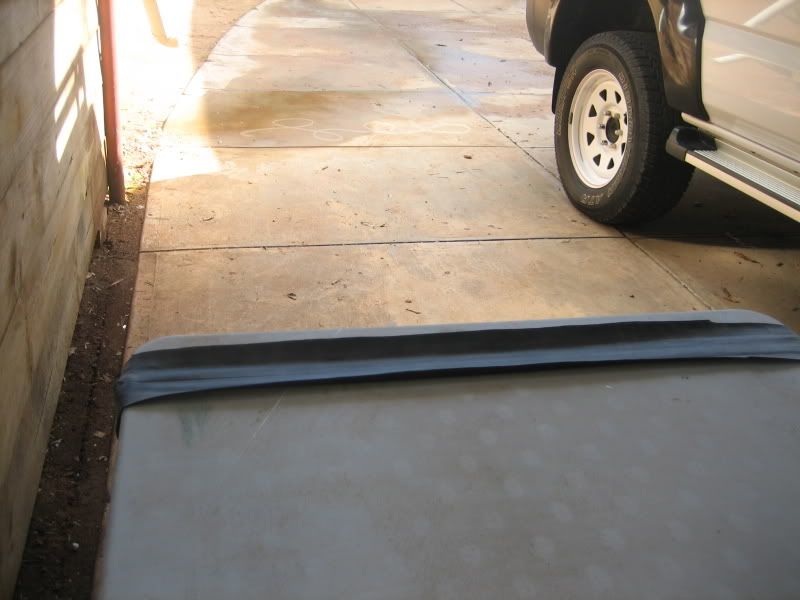
measure the inside of the rim and add 5mm, so if your inside is 18mm cut the strip 23mm thick . with the tube stretched over the table its a breeze to cut to size.
Clean the talc off the tube befor you start.
just use a straight edge and stanley knife. I did both tubes in about 10mins
cut in further at the valves as they are thicker rubber
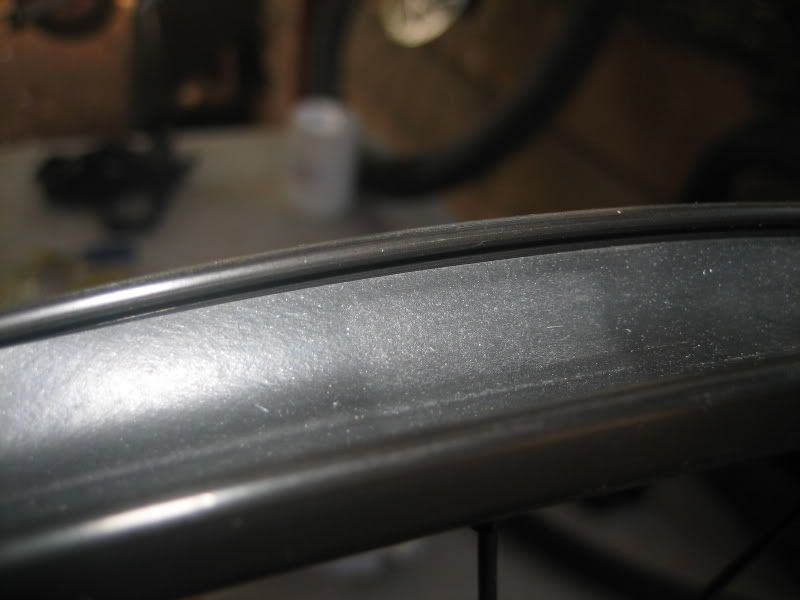
the tube needs to sit about 1-2mm under the bead of the rim.
if it doesnt , take it off and cut the desired amount off , i had to cut 2mm off my second strip , must have been that beer break messed up the calcs
it needs to sit beautifully all the way round , use the stans video from the website to see how it should be stretched on , its common sense really but watch the videos first ( i did )

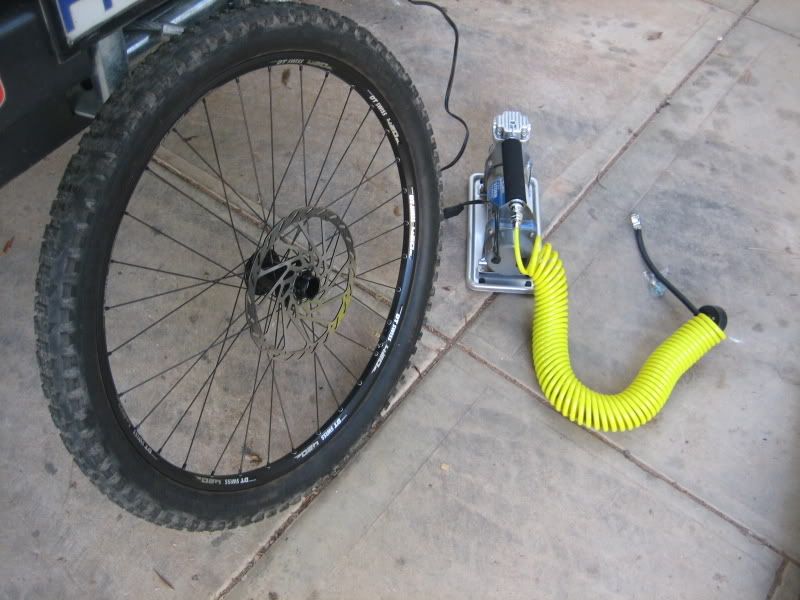
I then put the tyre on and pumped it up using my compressor , it leaked like a sieve BLOODY 3 corner Jack holes !!!!
SO pop the opposite side of the tyre from the valve off and pour in approx 200ml of latex water mix (consistence of slightly thicker full cream milk)
i bought a 1kg tub , i only needed 5 teaspoons per tyre , so the cheaper 500g would have done and lasted for years .
pop the tyre on and inflate to 60psi
do the "shake" as mentioned on the stans video.
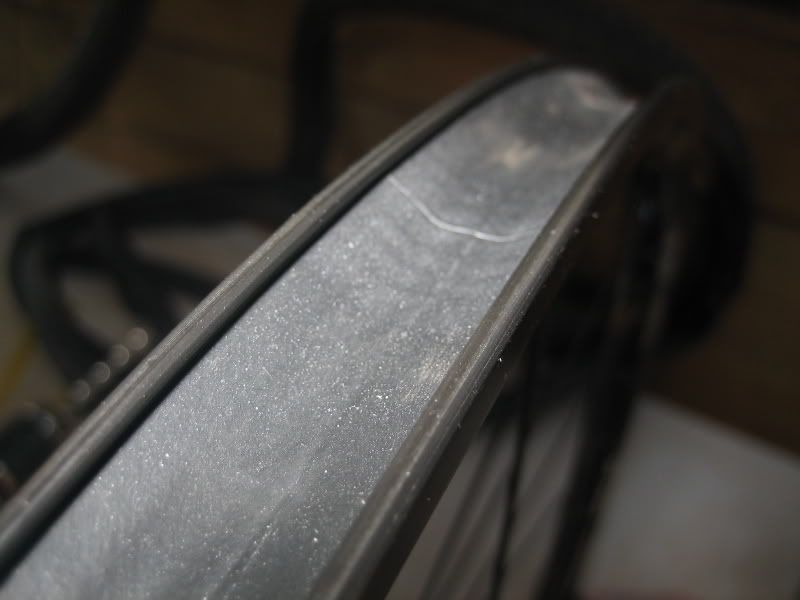
AMAZING .... NO HOLES , just white dots that wiped off
Both tyres done , inflated to 60psi !!!! will leave them at 60psi for 24 hours, then drop em down to normal
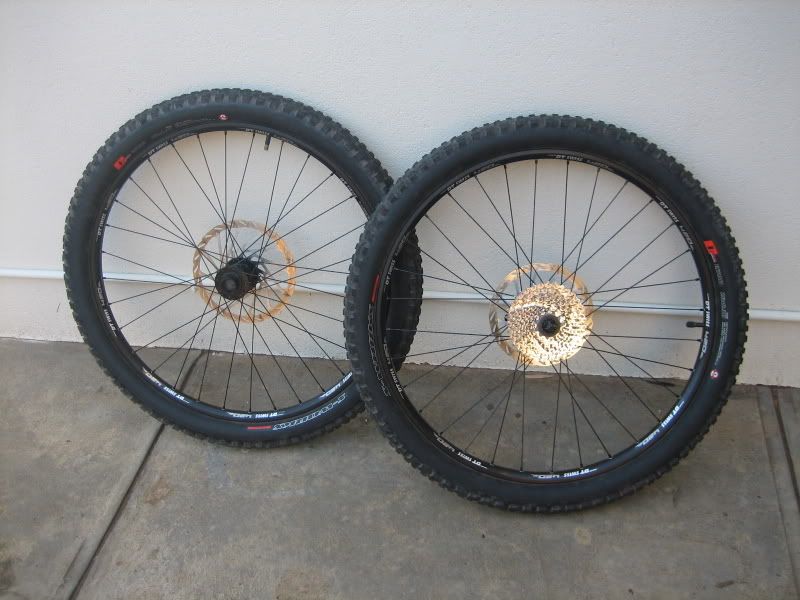
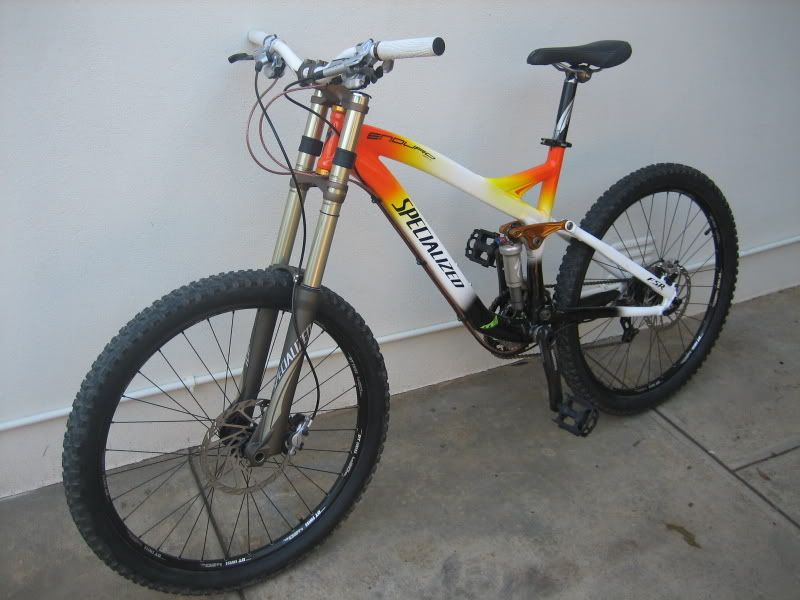
BACK IN BUSINESS !!!! ready for them thorns , same tyres that had OVER 40 punctures between them yesterday , now tubeless and practically puncture proof !!! and only cost $30 !
AND BEFORE SOMEONE TELLS ME , i have put the specialized packing pedals on to do a few laps to get the latex flowing , im between a borrowed pair of crank bros and my new shimanos (now fitted)
NOTE: go to STANS website and watch the videos on there before starting this mod , it all becomes very clear
Some of you guys might see part of your methods on here , Thanks a million for the tips.
I thought i would repay the favour by doing this step by step for others.
AWESOME
http://www.farkin.net/forums/showthread.php?t=128397
So i spent a lot of time last night trying to work out how to get back in the saddle ASAP without costing a shit load and taking a week .
So here goes with my $30 tubeless mod , i wouldnt have believed it if i hadnt seen it first hand ABSOLUTELY UNBELIEVABLE !
First get the bits ,
- 1kg of latex ($25 or $16 for 500g)
- 2 x 20" BMX tubes ($5.50 EACH)
- OPTIONAL - 1 x roll of packing tape ($4.70 from bunnings)
I read on someone elses mod that they used this tape as an air sealer , so just to be double safe i removed the rim strips and put this on.
Put it on as tight as you can, you wont break this tape . once round is enough , overlap by 50mm .
Use a stanley knife and a small round file to make the valve hole neat .
The BMX tubes have a bigger valve than the presta so i had to drill the outer rim valve holes 11/32.
Stretch the bmx tube onto the rim (as if you were going to fit it) putting the valve through the hole. Then cut around the outside edge of the tube (oppisite side from the valve)
when you have cut all the way around it will look like this ...
You now need to cut the tube down into a "rim strip" , stritch it around a table to make cutting easier
measure the inside of the rim and add 5mm, so if your inside is 18mm cut the strip 23mm thick . with the tube stretched over the table its a breeze to cut to size.
Clean the talc off the tube befor you start.
just use a straight edge and stanley knife. I did both tubes in about 10mins
cut in further at the valves as they are thicker rubber
the tube needs to sit about 1-2mm under the bead of the rim.
if it doesnt , take it off and cut the desired amount off , i had to cut 2mm off my second strip , must have been that beer break messed up the calcs
it needs to sit beautifully all the way round , use the stans video from the website to see how it should be stretched on , its common sense really but watch the videos first ( i did )
I then put the tyre on and pumped it up using my compressor , it leaked like a sieve BLOODY 3 corner Jack holes !!!!
SO pop the opposite side of the tyre from the valve off and pour in approx 200ml of latex water mix (consistence of slightly thicker full cream milk)
i bought a 1kg tub , i only needed 5 teaspoons per tyre , so the cheaper 500g would have done and lasted for years .
pop the tyre on and inflate to 60psi
do the "shake" as mentioned on the stans video.
AMAZING .... NO HOLES , just white dots that wiped off
Both tyres done , inflated to 60psi !!!! will leave them at 60psi for 24 hours, then drop em down to normal
BACK IN BUSINESS !!!! ready for them thorns , same tyres that had OVER 40 punctures between them yesterday , now tubeless and practically puncture proof !!! and only cost $30 !
AND BEFORE SOMEONE TELLS ME , i have put the specialized packing pedals on to do a few laps to get the latex flowing , im between a borrowed pair of crank bros and my new shimanos (now fitted)
NOTE: go to STANS website and watch the videos on there before starting this mod , it all becomes very clear
Some of you guys might see part of your methods on here , Thanks a million for the tips.
I thought i would repay the favour by doing this step by step for others.
AWESOME
Last edited: